Step 1 Prepare your information for registration
To ensure that you are a real or legitimate business, Amazon will require you to provide relevant information about the company and its legal person at the time of registration and verify and review the information you provide later.
Therefore, before you register your account, the first step is to prepare all kinds of materials and documents that you will need to register. This will greatly reduce the time you have to register, and always double check if you have typed everything correctly.
1. Check product information to avoid infringement
Check your products, brand name, and logo to ensure it will not violate other’s intellectual property rights. There are some Restricted Commodity Policies, Please check the product details and specific requirements of which need to submit the product qualification.
2. Prepare the basic information about your business
Let me remind you of one important thing that many people overlook, once you are convinced that your product meets the requirements, you’ll need to prepare your contact information, preferably only use for Amazon business, as this will avoid some hassles. Such as if you have signed an amazon store, the same telephone number or email address will easily associate the old account with the new account.
You’d better have all the information you need to register before you start the registration process. This will make your registration process smoother and faster. So to give you a clear vision of what you need, I have made a preparation list here.
Your contact information
- Primary contact email address.
- Available phone number.
- The full address of your company.
Identity verification of the account owner
- First & last name.
- DOB (Date of Birth).
- Government-issued ID like driving license number or identity card.
- Country of issue.
- A high-quality image of the front and back part of your ID.
- Bank account statement.
Company certificate
- Account name.
- Business License (of your company or corporation).
- Type of your business structure (sole proprietor, LLC, corporation, partnership).
- Registration state.
- Your Federal Tax Identification number (if you are American people ).
- Information about each beneficiary of the Company (directly or indirectly owning 25% or more of the company’s shares).
- UPCs/EAN codes (you can buy it on the official website).
Finance accounts
- Credit card detail (Visa/Master card etc. Which can charge your monthly fee of $39.99.)
- A U.S. bank account number for direct sales deposits
Others
- Any daily bills from your primary contact within the last 90 days, including utility bills, gas, Internet, TV, cell phones, or credit card statements(For Amazon Europe).
- The scanned copy of passport, or the front and back of ID card + the scanned copy of residence booklet (For Amazon Europe).
(This will be used for Seller qualification Audit. After you complete the registration, Amazon may ask you to provide these documents before opening the sales permission. So it is recommended to prepare as soon as possible)
Step 2 Start your Amazon seller registration
1. Find the website
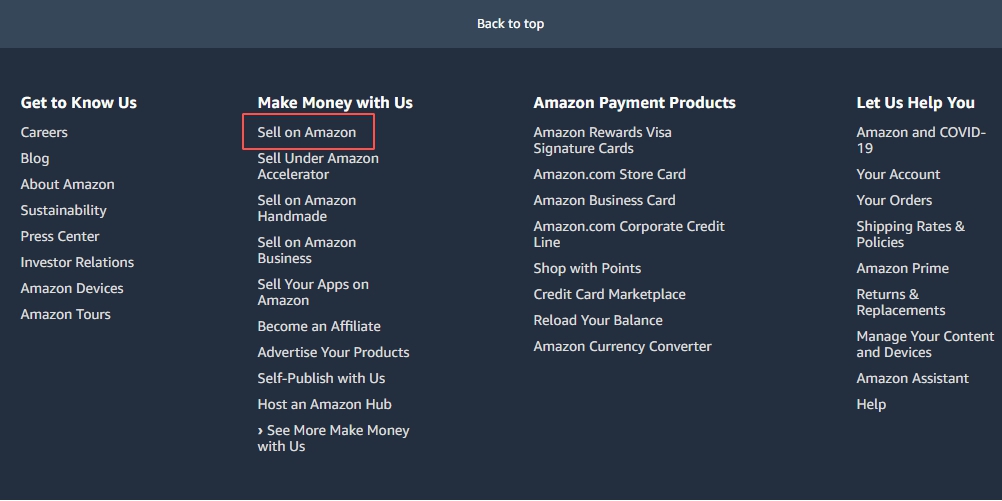
Open your browser and enter this link:https://www.amazon.com/ and slide to the bottom of the page,click on the “sell on Amazon” button.
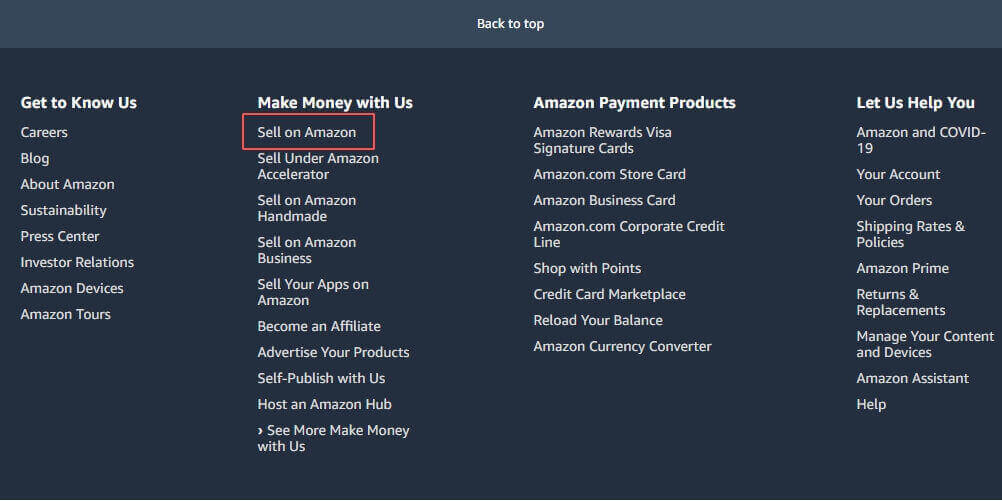
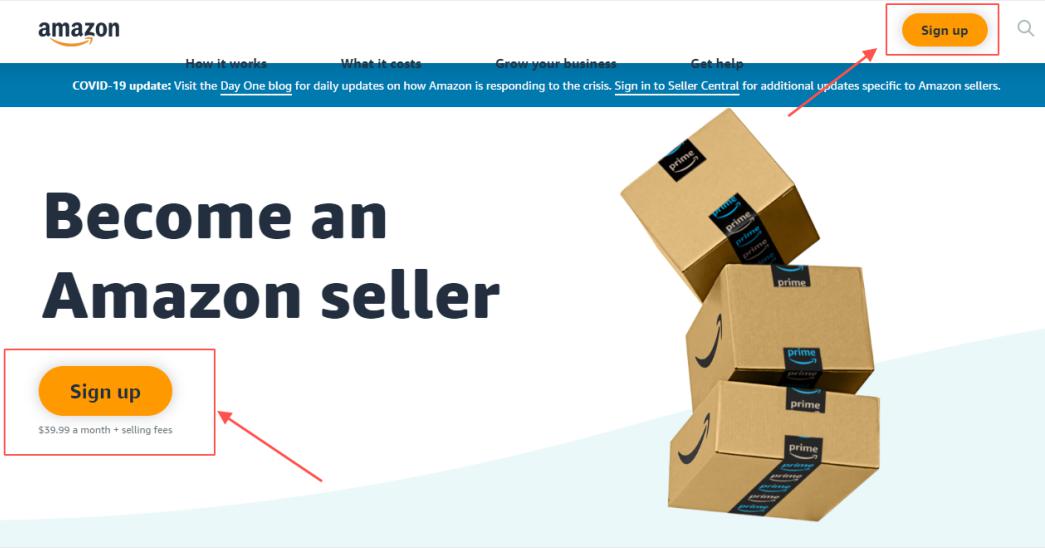
Then turn to the page and choose the button “Sign up”.
2. Log into Amazon seller central
Log into your Amazon account or use your email or phone to register a new account and set a password for it.
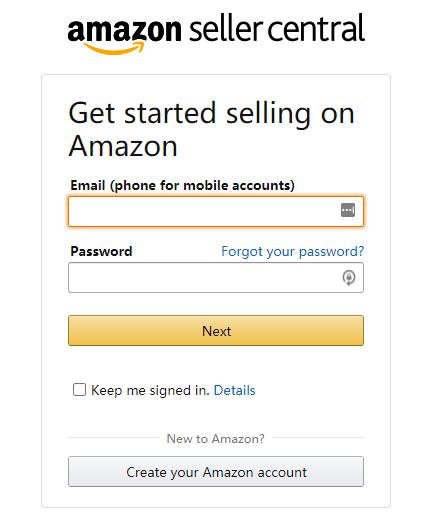
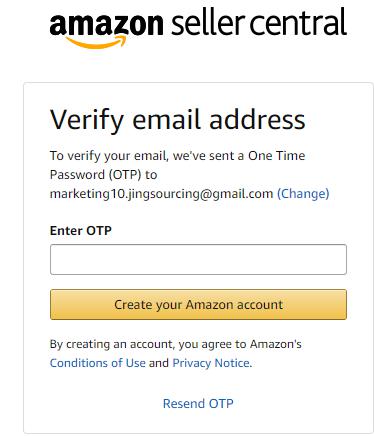
Amazon will send a one time password (OTP) to your email address, fill in the OTP, and create your Amazon account.
3. Ensure the following handy
Select your business location and business type, and the third question will change depending on the choice of the second question.
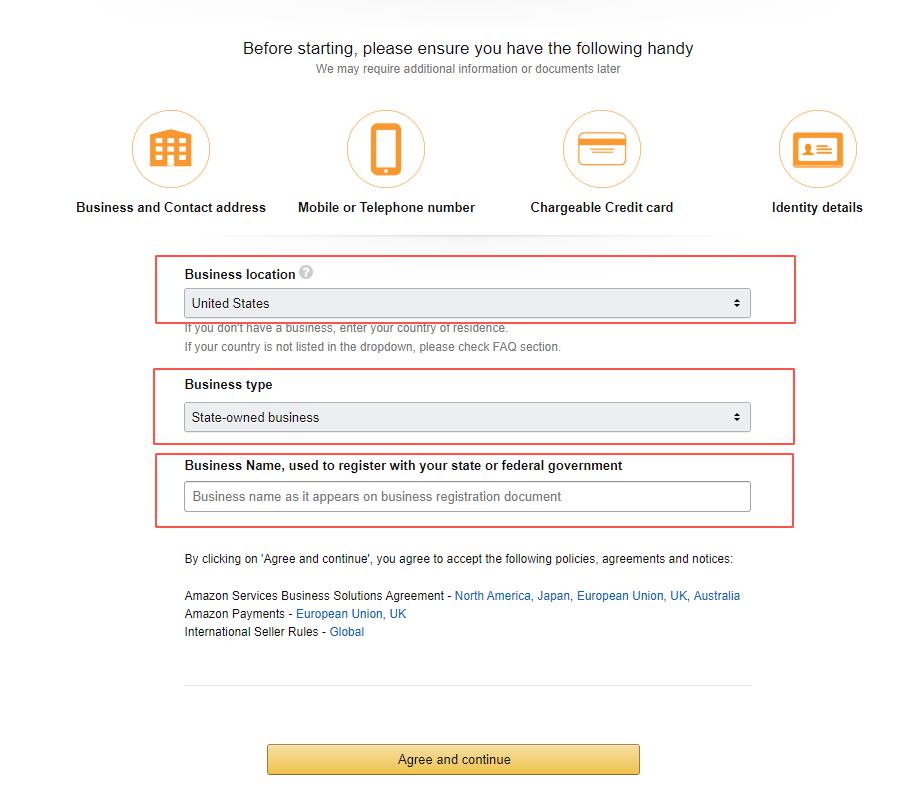
You will find there are 4 stages in the process.

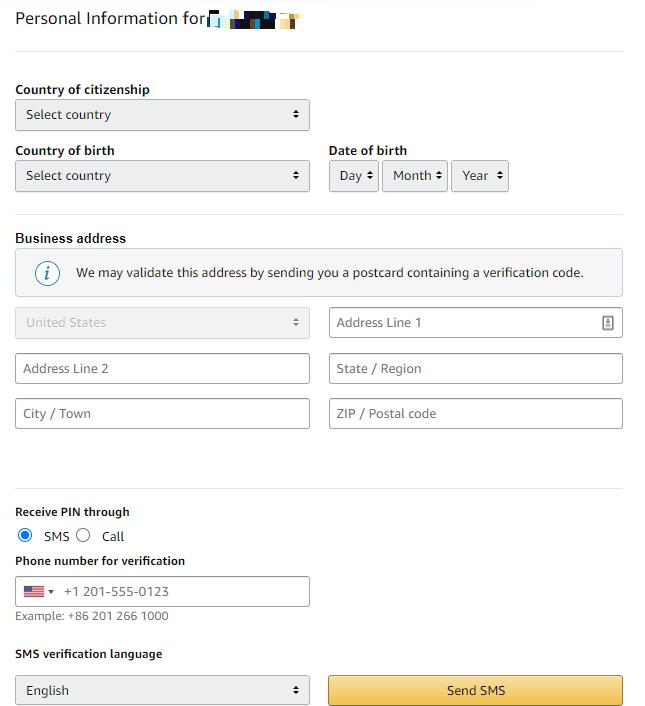
4. Fill in personal information
The first one is to fill in your personal information such as country of citizenship, country of birth, date of birth, proof of identity and expiration date, country of issue, business address.
5. Add credit card details
Next, you will be asked to enter your credit card details, and it will tell you about the monthly fee based on the issuing country you choose.
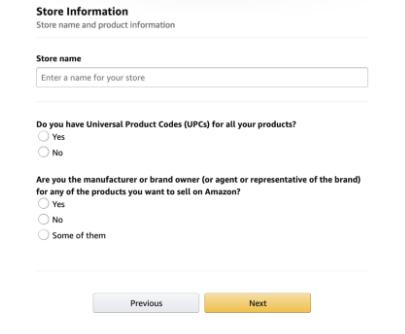
6. Select store information
At the store stage, you need to give your store an impressive name, preferably one related to your products, so that your customers can find you more easily.
And select “Yes” if you have a UPCs code for all your products, otherwise, you need to choose “No”.
If you are the manufacture of the product you plan to sell or you are a representative, you can choose “Yes” in the third question.
But if you are planning to resell some products on your Amazon store, then select “No”.
If you are not sure about the two ways of selling, you can choose the option “Some of them”.
7. Identity verification
The last step is verification, you will have to provide proof of the details you mentioned previously. There are two documents you have to upload “A picture of your identity”, and “Bank statement”.
After you submit all the information, the Amazon team will verify your details and documents provided by you in a few days. And you will receive a confirmation message from Amazon which means your amazon seller registration is completed successfully.
There may be some differences between setting up an Amazon global store in the UK and setting up an Amazon global store in the USA, so you may need to check the details when you log into the website.
Step 3 Account setting
As a beginner, you need to read the introduction of the Amazon Seller Platform because it tells you all things about selling on Amazon and you will spend a lot of time on the platform.
What’s more, confirm your credit card information to ensure it is in the payable state in real-time and bank account information to ensure you can receive the payment. And remember the credit card billing address and zip code, it will be helpful if you need to verify your identity when you login from another place.
Another thing is to set user permissions appropriately. If you want to provide access to others involved in business administration, you can adjust accordingly so that you can prevent your seller account from being stolen.
It’s also very important to set about shipping. You need to confirm and set the country of delivery, the region that can be sent, and the freight. The seller can choose to calculate the freight according to the number of pieces/weight of the goods and can set different freight according to the price range of the order.
Step 4 Apply for the Brand Registry
Once your amazon global store account is ready to set, the next step is to register your brand using ABR (Amazon Brand Registry). The brand registry can achieve better brand protection and marketing functions such as Accurate brand representation, Powerful search tools, and Proactive brand protection. (Brand Registry tools aren’t accessible to resellers.)
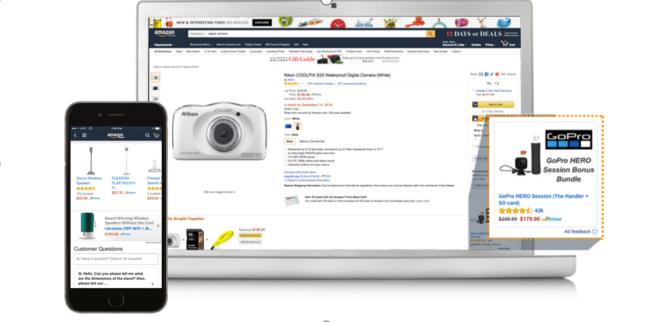
The most significant benefit of Brand Registry is that you can build a branded Amazon storefront. You can add content for every product page to enhance your connection with customers by introducing brand messages, lifestyle images and other assets.
One of the most important things is that if you have already registered with your brand, Amazon’s Brand Services will help you remove counterfeit sellers and protect your brand’s trademark from infringing to create an accurate and trusted experience for customers on Amazon.
Another tool-Brand Analytics can provide sellers many detailed data about Amazon shoppers which can help to analyze consumer shopping behavior.
So now the question is how can we apply for Brand Registry and what do we need in this process? The list below is what we suggest you prepare.
- Brand name, must have registered with the U.S. Patent & Trademark Office or other similar offices.
- Brand’s serial number registered with the USPTO.
- List of countries include where your products are produced and sold.
- Product image(s).
- Product label image.
- Product image which has a brand name on it.
Step 5 Design your Amazon store’s homepage and choose a preferred template
To sum up, you need an Amazon account, documentation proving that you are the owner of the brand and products with the brand logo. If you have prepared, head over to Amazon’s Brand Registry page and get your brand registered.
After finish all the work above, it’s time to design your store and we can begin with the homepage and the template.

Firstly, log in to Amazon seller central and find the option “manage stores” You will see a list of your brands that are eligible for Store creation. You can design your homepage by choosing from the list and options that Amazon provides to you and follow the guide. Pick the Store theme that you think is the best fit or that you like most about your Amazon store.
Step 6 Optimized store pages
In order to give customers a good shopping experience, it is very important to improve the browsing experience of our Amazon stores. This requires us to constantly optimize the web page, add more content to products, try every means to get more exposure, more clicks and more page views.
The additional pages such as “best-selling products” “catalog categories” “new products” “discounts” will be critical, as the ease of access can greatly affect the user experience. Good additional pages can help shoppers find what they want in a short time and attract them to keep browsing your store.
A clear, efficient product page can be more popular with shoppers. On the Amazon Marketplace, the key to success is to optimize product page, because optimized content will get your product in front of shoppers. There are some essential content tiles that must be included in each page of your products:
- Accurate and catchy titles.
- High quality and clear Images (Include the whole and details of the product).
- Short but content-rich
- Product grids.
- Galleries.
- Precise navigation.
The description of a product allows for 2,000 characters and each product page should have 6-9 images, preferably with some short videos as well.
Add some new brand content to each product page to reinforce the messaging and tell the customer more about the product. Don’t forget to use high-value search terms in the descriptions to increase exposure.
Accurate search terms and precise titles can dramatically improve a shopper’s view of a product. Try to use high-value search terms to improve your product page.
Step 7 Upload products
The next step is to add your products after you have designed the product pages. For every product, there is a product inventory, so shoppers can know about whether they can buy this product now. You also need to stock your store with items that you want to sell, provide a wide collection of items for buyers to pick from.
You should assign UPC codes or ASINs (Amazon Standard Identification Number) to every product, although it is only a matter of copy and paste. After that, you can upload your entire product inventory in one go.
Step 8 Submit and review your pages
The last step about setting up an amazon store is to submit all the pages include your homepage and product pages to Amazon. However, before your submission, it’s highly recommended that you do a thorough review before submitting so that there aren’t any mistakes as below:
- Grammar and spelling mistakes.
- Any image or branding inconsistencies.
- Issues with navigation, product images, and content tiles.
To make sure your pages are error-free, you can use proofreading tools like Proofreader, which help catch grammar mistakes and improve the clarity of your content.
Then, submit these pages to Amazon and you’d better review them on PC, smartphone, tablet, or other electronic devices to see if they fit well and adjust accordingly.
The end
Thank you for reading and you can share it with your friends who need it. While today we have introduced how to set up an Amazon store globally simply by eight steps. I have to say starting an Amazon business isn’t as easy as it might seem. The key to success is not only about your store setup, but also related to your product selection and reliable suppliers.
We are the best sourcing agent in China to help importers source the products with the most competitive price, 20% of our clients are Amazon sellers. So if you want to source products from China or import from China to sell on Amazon, please do not hesitate to contact us.